Showing posts with label knitting patterns. Show all posts

Thursday, January 5, 2012

Lap blanket pattern


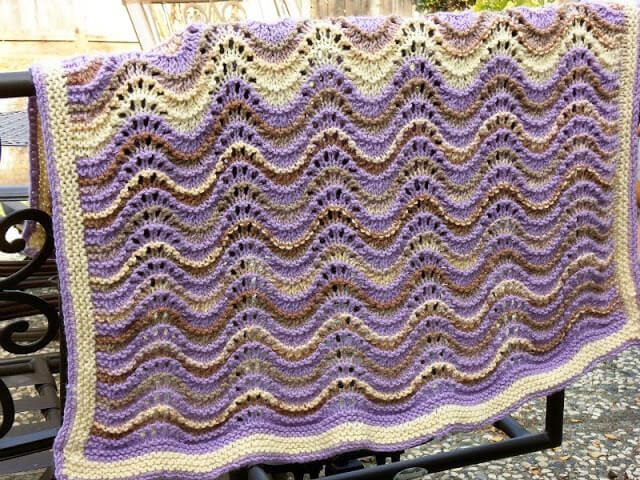
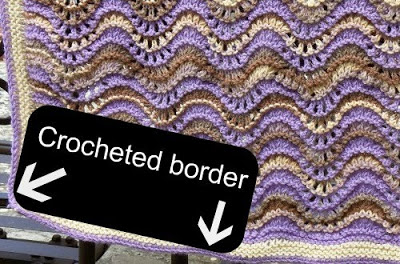
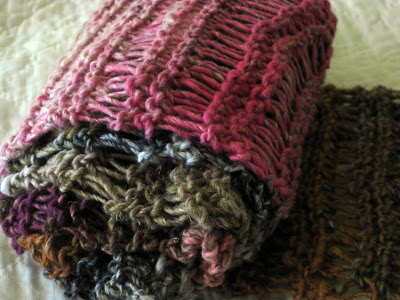
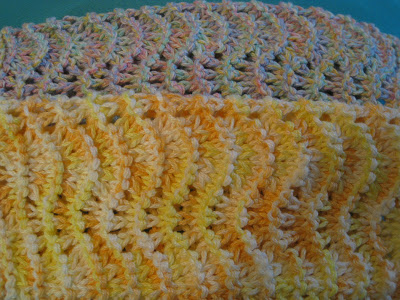
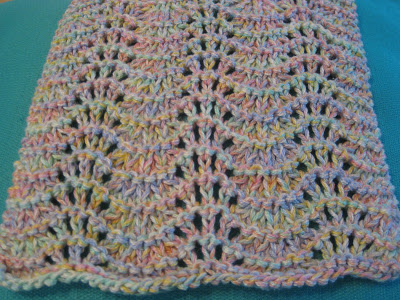
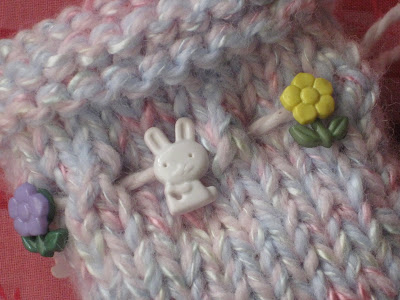
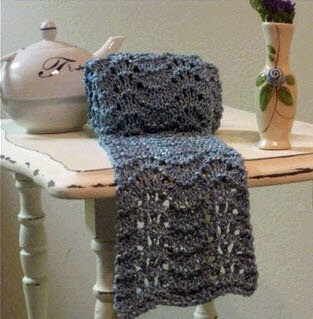
I managed to finish the lap blanket for my mom by Christmas day. It doesn't exactly look like the scratchy purple afghan my grandmother knit in the 1970's like I was shooting for, but it does have a retro essence. I washed it with tons of fabric softener to make it soft and nice-smelling.

I didn't measure the blanket before I gave it to my mom, but I'm guessing it was about 30" by 30". (Pretty small, but big enough to be cuddly and warm on your lap.)

To border or not to border? (That is the question.)
This blanket features a garter stitch border with picked-up stitches, plus a final single crochet edging. The reason I did this is because I realized halfway through knitting it that it needed a bit more width. I wasn't about to frog the whole thing and start over, so when I finished the body of the blanket I added the borders and they actually worked beautifully, adding extra width and heft plus a nice finished look.

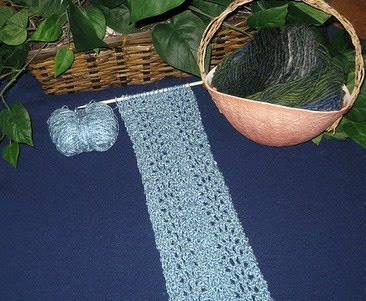
If you don't want to add the borders, when you begin the blanket you could cast on more stitches to make it wider. Keep in mind that the feather and fan lace pattern is an 18-stitch repeat, plus there are three selvage stitches on each side. So, instead of casting on 114 stitchs like the pattern calls for, you could cast on 132 stitches, which would give you one extra pattern repeat on each row while continuing to have three selvage stitches on each side. If you want to cast on less stitches than that, the extra stitches could be added to the number of selvage stitches on each side rather than increase the number of pattern repeats.

Supplies:

Plymouth Yarn Encore Worsted. Five skeins: one champagne (#218), two light lavender (#233), two variegated brown and lavender (#7149). You will have leftovers of each color.

Size 10 circular needles, 32 inches (The blanket is knit flat but circular needles are used to accommodate the number of stitches.)

To knit the lap blanket:

Cast on 114 stitches in lavender.

Rows 1 - 3: Knit.

Row 4: Knit.

Row 5: K3, purl across row, end with K3. Throughout the entire blanket you will maintain the three selvage stitches at the beginning and end of each row.

Row 6: K3, *K2TOG three times, (K1, YO) six times, K2TOG three times*, repeat across row, end with K3.

Row 7: Knit.

Repeat rows 4 - 7, changing colors every four rows. I carried the yarn up the side to avoid having to weave in tons of loose ends. I also added a random four row repeat in champagne roughly in the middle of the blanket ... just because.

Continue the four-row repeat until the blanket reaches the desired length. End with the four-row repeat in lavender, knit thee rows in lavender, and then bind off.

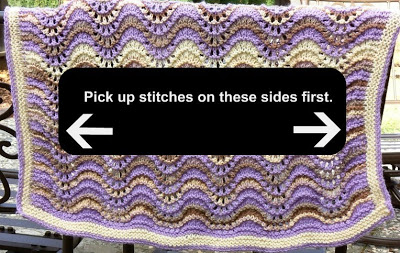
To create the first border:

In champagne, pick up 79 stitches along the edge of one side (a non-cast on or bind off side) and knit five rows in garter stitch. Bind off. Do the same for the opposite side.

In champagne, pick up 102 stitches along the cast-on edge and knit four rows. Bind off. Do the same for the opposite side , which is where you did the bind off.


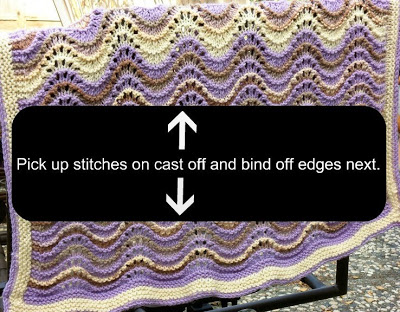
To create the second border:
In lavender, do a single crochet border around the entire blanket.


I machine washed my blanket and then blocked it on a towel on the dining room table. The pattern looked much more defined after blocking it, plus the little mistakes I made seemed to blend in better.

Thursday, July 7, 2011

Soap Bag Knitting Pattern


My friend Sheila sent me this fun, quickie pattern for a soap bag. Her niece makes handmade soap and needed a way to enhance her sales, so Sheila designed the sack for her.

"The nice thing about the sack," says Sheila, "is if you use a wash cloth or one of those net scrubbies when you shower, you can take the soap sack right in to the shower with you. For children or elderly who have a hard time hanging on to that slippery bar of soap, the sack keeps the soap from slipping out of your fingers. I love the gentle exfoliating as well."

I knit Sheila's soap bag last weekend and enjoyed the combination of stockinette, YO's, and drop stitches. Plus I was able to finish the bag in under two hours. The soap I used is E. Barrett & Company French Soap in Ocean and it smells heavenly.


Supplies:

25 yards worsted weight 100% cotton
Size US 7 knitting needles
Ribbon, raffia or yarn for use as a drawstring


To knit the soap sack:

Cast on 15 stitches.

Rows 1 - 4: Knit in stockinette.

Row 5: *K2TOG, YO* ending with a YO and then knit the last stitch.

Row 6: Purl

Rows 7 - 10: Knit in stockinette.

Row 11: Knit across row, wrapping each stitch twice around the needle when forming the stitch.

Row 12: Purl, dropping each stitch.

Repeat these 12 rows two more times.

Knit four rows stockinette.

Knit one row *K2TOG, YO* ending with a YO and then knit the last stitch.

Starting with a purl row, knit four rows stockinette.

Bind off. You will have a total of four YO rows and three drop stitch rows. The third drop stitch row is the bottom of the bag.

Seam sides of bag using mattress stitch being careful to line up the YO rows and the drop stitch rows.

Weave a piece of ribbon, raffia or yarn through the top row of YO's, insert soap and tie the drawstring.

* * *

If there are any errors in this pattern they are mine, so feel free to let me know in the comments or at stacy@goldenbirdknits.com and I will make corrections.

If you would like to talk to Sheila, the designer of the pattern, please contact her at kayteetoo@hotmail.com.

Sunday, June 26, 2011

Drop Stitch Scarf Knitting Pattern


The first thing I ever learned to knit was a garter stitch scarf. The second thing was a drop stitch scarf. It was exciting to have learned a new trick (wrapping the yarn around the needle two times per stitch and then dropping it on the next row), although back in those days I was so focused on perfection that I usually ended up frogging it. Drop stitch isn't about perfection, it's about ... well, dropping perfection. Knit with variegated Noro yarn gives it a casual, rustic look.


This pattern is a slightly revised version of one I acquired from my local yarn shop. It is a very, very common pattern so I feel okay posting it here. The scarf is knit in Noro Taiyo, which I find softer than Kureyon, and is approx. 70 inches long and 6 inches wide.

Note 1/7/12: Today I saw a similar scarf for sale in an upscale women's clothing catalog. The retail price was $109. Feels good knowing I can make my own for the cost of a skein of yarn.

Supplies:

Noro Taiyo (one skein, 220 yards) or Noro Kureyon (two skeins, 110 yards each). Taiyo is a cotton/silk/nylon/wool blend and Kureyon is 100% wool. Both are Aran weight.

Size US 11 needles

To knit the drop stitch scarf:

With a cast on of 20 stitches, knit two rows.

On the third row, knit across the row wrapping the yarn twice around the needle for each stitch. (The way I do it is insert the right needle in to the stitch on the left needle, wrap the yarn around the right needle twice and then complete the stitch.)

On the fourth row, knit across, dropping the double-wrapped stitch as you go. (In other words, knit the double-wrapped stitch as if it were a regular old single-wrapped stitch and ignore how big and clumsy it looks.)

The scarf will look quite imperfect as you go, but don't let that bother you. Just give the drop stitched rows a gentle tug once in a while to pull down the long stitches.

Repeat the four rows until your scarf reaches the desired length and end on rows two and three.

You can easily modify this pattern by changing the needle size, increasing or decreasing the number of stitches you cast on and/or the number of garter stitch rows between drop stitched rows.


Monday, December 13, 2010

Simple Lace Scarf Pattern

I wrote about this scarf last month, but wanted to officially post the pattern with decent pictures. That's my sister Hil modeling the scarf after I gave it to her last night. She's just starting to get a baby bump.

It's a simple one row lace scarf knit on big needles. The Malabrigo yarn that I used is pillow soft. I'm sensitive to wool and usually can't wear it next to my skin, but this yarn didn't bother me at all when I tried on the scarf.


After I washed it in rinse-free Soak and blocked it, the pattern opened up and it got quite a bit longer. (Flora-scented Soak smells SO good. )

If you want your scarf narrower or wider, just be sure to cast on a multiple of four stitches. I think this pattern would also look good in a fine weight yarn using much smaller needles.


Supplies:

Two skeins of Malabrigo Merino Worsted

Size 15 needles

Abbreviations:

K2: knit two stitches

YO: yarn over

PSSO: pass slipped stitch over

To knit the scarf:

Using size 15 needles, cast on 16 stitches.

Row one: *K2, YO, slip one stitch purlwise, K1, PSSO*, repeat to end of row.

Repeat row one until scarf reaches desired length.

Cast off and enjoy.

Monday, December 28, 2009

Easy washcloth knitting patterns

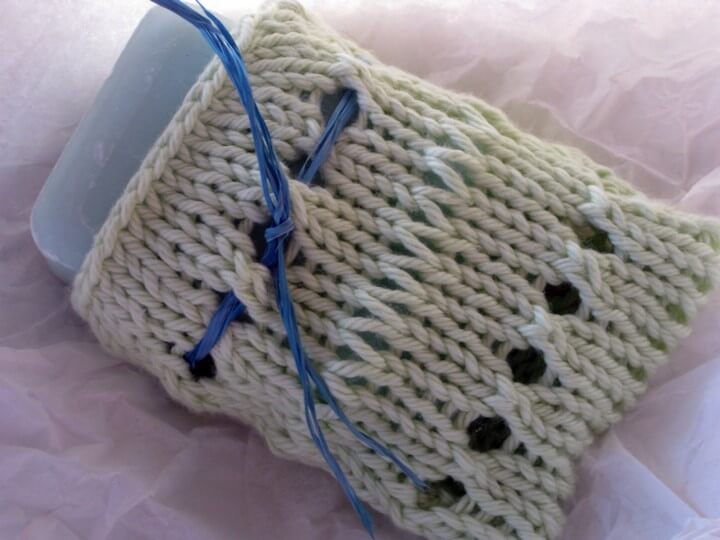
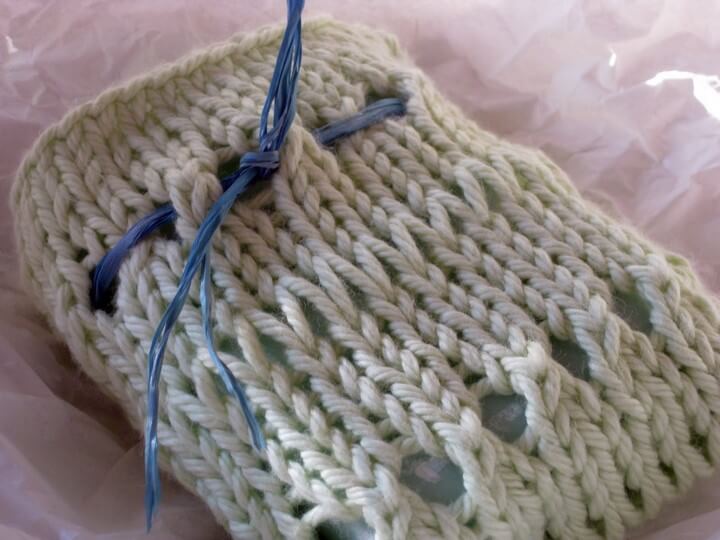
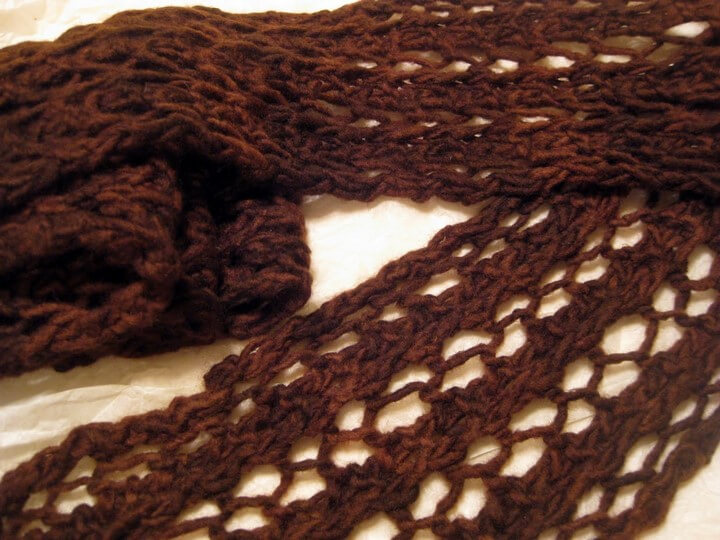
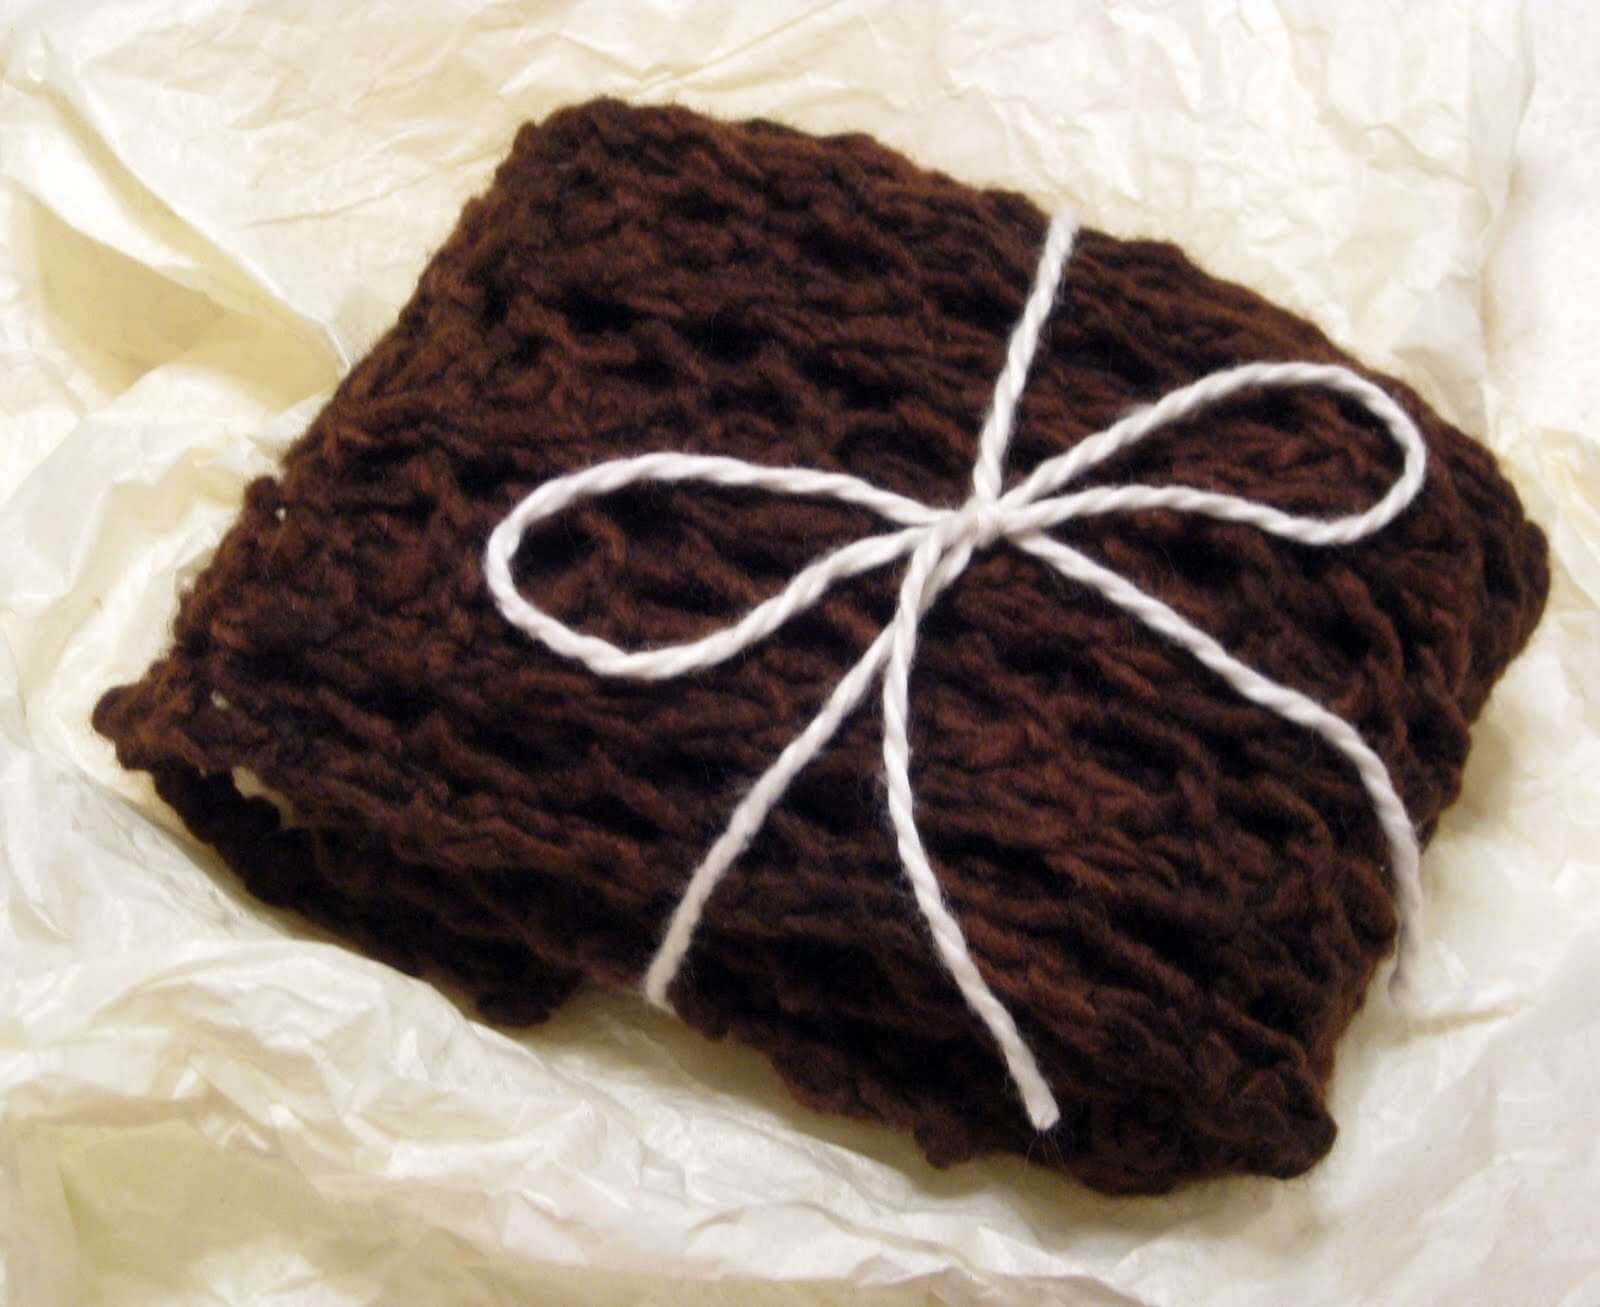
I'm on a big washcloth kick right now-- they can be finished in one or two evenings and are simple enough to knit while watching a movie. My goal is to have a supply on hand for birthdays and special occasions throughout the year. They make nice gifts when you fold one or two in to a small basket and include a bar of scented soap.
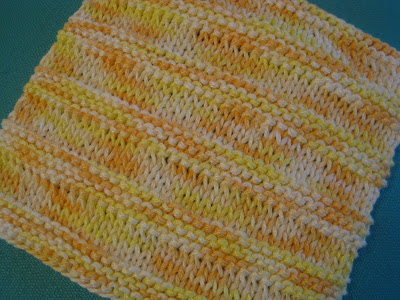
Supplies:

-Fantasy Naturale 100% Cotton Mercerized (you can knit both patterns with one skein of yarn)

-Size US 8/5 mm straight needles


To knit the ridged washcloth shown above:

Cast on 34 stitches.

Begin the pattern:


Knit 5 rows in garter stitch.

Knit 4 rows in stockinette, beginning with a knit row.

Repeat the pattern until the cloth is 7 inches long or desired length, ending with the four rows of stockinette. Knit two more rows and b ind off.


To knit the feather and fan wash cloth shown above:

(This cloth also makes a great dishcloth by making it a couple inches longer than the pattern calls for.)


Cast on 40 stitches.
Knit two rows in garter stitch.

Begin the feather and fan pattern:

Row 1: Knit.

Row 2: K2, P36, K2

R
ow 3: K2, * K2TOG twice; YO, K1 four times; K2TOG twice.* Repeat from *, knitting the last two stitches.

Row 4: Knit.

Repeat the four pattern rows until the cloth is 7 inches long or desired length, ending with row 4. Knit two more rows and bind off.

Friday, December 4, 2009

Fingerless Gloves knitting pattern


These fingerless gloves are knit in a square shape and then seamed up one side, leaving a hole for the thumb. The pattern is suitable for beginners and the gloves are a medium adult size.

I discovered this stitch by accident several years ago when I cast on the wrong number of stitches for a two-by-two rib. I'm sure it has a name, but I haven't been able to find it. It's a reversible stitch that creates a stretchy fabric and looks best when knit with small needles.


Measurements:

9 inches long

3.5 - 4 inches wide (gloves are narrower around the fingers)

Supplies:

Two skeins Noro Cash Island (Aran weight, 60% wool, 30% cashmere, 10% nylon)

Size US 6 (4 mm) straight needles

Tapestry needle for seam

Abbreviations:

K2TOG: Knit two stitches together

To knit the fingerless gloves:

Cast on 42 stitches.

*K2, P2*, repeat from *. Continue this repeat until the piece is 2.5 inches long.

Decrease two stitches: K2TOG, *P2, K2* to last two stitches, K2TOG. (40 stitches)

K1*P2,K2* to last stitch, K1. Repeat until the entire piece is 9 inches long.

Bind off.

Use mattress stitch to seam the side starting with the wider edge where you cast on. Leave a 1.5 inch gap in the seam for the thumb approximately 2 inches from the top (the narrower edge where you did the bind off).

Make a second one using the same pattern.

Here is an example of the fingerless glove using the same pattern and needle size, but with alpaca yarn.

Please feel free to contact me with any questions about this pattern.

Monday, November 9, 2009

Slippers knitting pattern


Here is the knitting pattern for these cozy slippers in a medium adult size. I didn't design the slippers, this is a classic pattern that has been around for ages. The slippers are knit on straight needles with two strands of yarn and seamed at the heel and front.


Supplies:

Two skeins of worsted weight yarn

Size US 9 needles

Tapestry needle for seams

Abbreviations:

K2TOG
: Knit two stitches together

SKP: Slip one stitch from the left needle to the right needle, knit the next stitch, and then pass the slipped stitch over the knit stitch and let it drop.

Gauge: 8 rows of garter stitch with two strands of yarn = 1"

To knit the slippers:

With two strands of yarn, cast on 29 stitches.


Row 1: K9, P1, K9, P1, K9 (this is the wrong side).


Row 2: Knit.


Repeat these two rows until the piece is 6 inches long or 2 inches shorter than your foot, ending on a wrong side row.


Begin the toe ribbing
:

Row 1: P1,*K1, P1, repeat from *.


Row 2: K1, *P1, K1, repeat from *.


Repeat until the ribbing is 2 inches long, ending on a wrong side row.


Shape the toe:

Row 1: Rib 7 stitches, SKP, K1, K2TOG, Rib 5, SKP, K1, K2TOG. Rib to end of row.


Row 2: Rib 7 stitches, P3, Rib 5, P3. Rib to end of row.


Row 3: Rib 6 stitches, K2TOG, K1, SKP, Rib 3, K2TOG, K1, SKP. Rib to end of row. You will have 21 stitches.

Finish the slippers:

Cut the yarn with a 24 inch tail. Thread the tapestry needle and slip it through the stitches once, and then do it again in the same direction. Pull the stitches as tightly together as possible to close the toe of the slipper.

Seam the front portion of the slipper one inch in to the garter stitch section.

Seam the heel until you reach the purl stitched edge of the sole. Sew an overcast stitch all around the edge and pull tightly to close the heel. Secure the yarn with a few stitches and weave in end.

Tuesday, August 18, 2009

Felted digital camera case knitting pattern


When I bought my digital camera, the clerk at the store tried to sell me a case to go along with it. My eyes lit up when he mentioned it-- something new to knit and felt. I loved that I was able to go home and make my own rather than purchase it in the store, and I loved it even more when I spilled a little water in my purse and the felt case protected my camera by soaking it up.

For this pattern, I used Malabrigo Worsted Merino yarn. It is my absolute favorite yarn to felt with-- it's soft when you're knitting, and felts up fast and thick in the washing machine. I realize the colors in the variegated yarn that I used aren't the most beautiful, but I found it on sale for 30% off, so I'm willing to live with it.

This is an easy pattern, knit side-to-side rather than lengthwise, but it does involve picking up fourteen stitches. I used to avoid patterns that require picking up stitches because I didn't know how to do it and thought that it sounded hard. It turns out it's easy-peasy and kind of fun. Here is a tutorial provided by Knitty .

The finished case is approximately 4" wide at the top, 3" wide at the bottom, and 5" long. If you want to experiment, this post includes a picture of the case with vertical stripes.

Supplies:
-Worsted weight wool yarn that can be felted
-Size 11 needles
-Button, thread, and sewing needle
-Tapestry needle for seaming the sides

To make the digital camera case:

1) Cast on 50 stitches.

2) Knit 26 rows in garter stitch and then bind off loosely.

3) Pick up 14 stitches centered along one of the short edges to begin forming the flap.

4) Starting with a knit row, work 13 rows in stockinette, and then bind off. This is the flap.

5) Use a tapestry needle to seam up the sides. The nice thing about felting is that your seams don't have to perfect; the felting hides little imperfections.

6) Felt the case. I felted mine by placing it in a pillow case and washing it in hot water along with a towel for a cycle that lasted approximately 30 minutes. It came out of the washer perfectly felted, but please keep in mind that felting is unscientific and your case may require more or less time to get to the correct size. Check it occasionally during the cycle.

7) After the case has dried, sew the button on the outside of the case under the flap.

8) Use a craft blade to slice the buttonhole in the correct place on the flap.

Use and enjoy!

Wednesday, July 22, 2009

Seed Stitch Baby Booties Knitting Pattern


Here is a pattern for easy-to-knit baby booties that I created for a charity project. This pattern was inspired by Bev's Stay-on Knit Booties.


They are knit on straight needles with yarn made with 100% corn fiber which is quite soft for baby's tender little toes. You can easily substitute it with any type of sport weight yarn.

The booties are knit in one piece and then seamed in the front and back. The finished bootie measures approx. 3.5" from toe to heel. I designed them for newborns, but a friend told me the pair I gave her fit her three month old perfectly.


Supplies: - Kollage Corntastic (less than one skein). Or any sport weight yarn.

-Size US 6 straight needles

-Tapestry needle for seams


To knit the booties:


Cast on 32 stitches.


Rows 1 - 15: Work seed stitch for 15 rows.


Row 16: Bind off 6 stitches knit-wise and then knit to the end of the row. (26 stitches)

Row 17: Bind off 6 stitches purl-wise and then purl to the end of the row. (20 stitches)

Row 18 - 23: Continue working stockinette stitch for 6 rows.

Row 24: Knit two together across the row. (10 stitches)

Row 25: Purl.

Row 26: Knit two together across the row. (5 stitches)

Slip the remaining 5 stitches off the knitting needle and on to the tapestry needle.

Pull the yarn through the stitches, tightening the toe.


Sew the front and back seams using mattress stitch.
 

Monday, June 8, 2009

Mesh bamboo scarf knitting pattern


A lightweight, incredibly soft scarf perfect for a cool evening. Knit with 100% bamboo in a simple mesh pattern. Appropriate for beginners and more advanced knitters looking for a simple project that doesn’t require too much concentration.

This reversible scarf is approximately 3" wide and 60" long. To make a wider scarf, cast on a multiple of three stitches plus two (for example, 26, 32, or 38 stitches). To see variations of the pattern knit by others, please see my post titled More mesh scarves.


Abbreviations:

K1: knit one stitch
K2TOG: knit two stitches together
YO: yarn over

Supplies:

Southwest Trading Company 100% Bamboo (one ball)
Straight needles size US 10

Note: Your scarf-in-progress will look different than mine because it needs to be lightly blocked when finished to flatten it and open up the pattern. I block mine by dampening it with water and laying it flat on a towel on a table.

To knit the scarf:

Cast on 23 stitches

Row 1: Knit

Row 2: Knit

Row 3: K1 *K1, YO, K2TOG*; repeat from *, end the row with K1

Repeat rows 2 and 3 until scarf reaches desired length, ending with row 3.

Knit two more rows and then b
ind off.

Lightly block the scarf to flatten it and accentuate the pattern.

Update: Here is an example of the same pattern knit in pink and white bamboo. This is one of my favorite scarves because the bamboo isn't scratchy against my neck, plus the pink just makes me feel pretty.

Friday, May 15, 2009

Drawstring bag knitting pattern


Notes:

This bag is knit in the round on circular needles holding two strands of yarn together to create an interesting color and to make it thick and sturdy. The d
imensions are 7" wide and 8" long.


The flower was knit using a pattern inspired by the book Vintage Hearts & Flowers .

Supplies
:

Plymouth Yarn Fantasy Naturale 100% mercerized cotton,#6399 purple, one skein or less

Patons Grace 100% mercerized cotton, #61901 Tangelo, one ball or less

Size 9 (5.5 mm), 16” circular needle

Three double-pointed size 9 (5.5 mm) needles for three-needle bind off (optional- you could do a regular bind off and seam the bottom instead)

To knit the drawstring bag:

Holding the two different strands of yarn together, cast on 57 stitches. (You'll knit the entire bag with both strands of yarn.)

Knit one row, slip on a place marker and then join the yarn .

Knit until bag measures 3 inches.

At place marker, knit an eyelet round: *K3, YO, K2TOG*.

Continue knitting until bag measures 8 inches from cast on edge.

Bind off using the
three-needle bind off method. Or, you could use your preferred bind-off method and then seam the bottom of the bag using mattress stitch.

Make a
twisted cord drawstring.

Thread the drawstring through the eyelets of the bag.

Embellish with knit or crochet flower.


Ta da! You're done.

Any questions, please leave a comment or send me an email.

Thursday, March 26, 2009

Goodie bag knitting pattern

This little goodie bag is a fast, easy project and a great way to use up partial balls of yarn in your stash. It can be filled with candy or other delights and given to a child (or a child at heart).

The bag is knit in one piece and then folded in half at the bottom and seamed at the sides. The finished bag is approx. 3" wide and 4" in height.

Although I designed this one for Easter, with a little imagination you could knit one for any holiday ... or just because.


Supplies:

Two balls of worsted weight yarn. The bag in the photo was knit with Jelli Beenz. (The bag takes far less than one ball of yarn, but it is knit holding two strands together.)

Six Easter or spring-themed buttons. The buttons shown were purchased at JoAnn Fabrics.

Two beads large enough to thread on the yarn.

Straight needles size US 8.

Tapestry needle for seaming the sides of the bag.


To make the bag:

With two strands of yarn, cast on 14 stitches. You'll knit with two strands throughout the entire project.

Knit four rows garter stitch.

Starting with a purl row (wrong side), work five rows stockinette. You should end with a purl row.

Knit the eyelet row: K1, *YO, K2TOG*, repeat. Knit the last stitch.

Beginning with a purl row, work stockinette for three inches.

Starting with a purl row (wrong side), knit two rows. (This forms a ridge that is the beginning of the fold at the bottom of the bag.)

Purl one row. (This is the bottom of the bag.)

Knit three rows. (This forms the second ridge in the fold.)

Beginning with a purl row (wrong side), work stockinette for three inches, ending with a purl row.

Knit the eyelet row: K1 *YO, K2TOG*, repeat. Knit the last stitch.

Beginning with a purl row (wrong side), work five rows of stockinette.

Knit four rows garter stitch.

Bind off.

To finish the bag:

Fold the bag in half along the ridges at the bottom and seam the sides using mattress stitch, aligning the eyelets so they are on the same row all the way around the bag. (I used one strand of yarn for the seam.)

Cut a strand of yarn approx. 17 inches long and weave it in and out the eyelets, stringing the decorative buttons on it at regular intervals. Knot the two ends of the string together a couple inches from the end. Thread a bead on to each of the ends and secure it with a knot.


Fill with candy or other goodies and give to loved one.

Sunday, February 15, 2009

Blue bamboo scarf knitting pattern


Today was a cozy, rainy day, and I spent it curled up on the couch with a cat in my lap, knitting and watching movies. This scarf was the perfect project for today-- mindless enough that I could keep an eye on my movies, but not mindless enough to be boring.

.It's knit with Berroco Bonsai, which is 97% bamboo and 3% nylon. It has a bit of a shine to it and sort of glistens. The pattern is a classic called feather and fan. mmmmmmmmmmmmmmmmmm mmmmmmmmmmmmm mmmmmmm mmmmm Abbreviations:

K1:
knit one stitch

K2TOG: knit two stitches together

YO: yarn over

Supplies:
Berroco Bonsai yarn (three skeins, 77 yards each) or any worsted yarn of your choice

Size US 7 straight needles

To knit the scarf:

Cast on 24 stitches.

Knit three rows in garter stitch.


Begin the four-row pattern repeat:

Row 1: Knit

Row 2: Purl

Row 3: *K2TOG twice, (YO, K1) four times, K2TOG twice*, repeat the entire sequence across the row until you get to the end

Row 4: Knit

Repeat the four-row repeat until your scarf reaches the desired length.

Knit three rows in garter stitch.

Bind off.

Wednesday, February 4, 2009

Miniature Knitting Bag pattern

This miniature knitting bag can be completed in an afternoon and makes an excellent ornament or gift for a knitting friend. It's also a great way to use up leftover sock yarn.


The bag is knit as one long piece and then folded at the bottom and seamed at the sides. The handle is an I-cord. The finished size is approx. 3.5 inches from the bottom of the bag to the top of the handles and 2.5 inches wide.


Supplies:

Claudia Hand Painted Fingering yarn or sock yarn of your choice

Size US 3 straight needles for bag, size US 2 double-pointed needles for the I-cord handle

Scrap yarn for stuffing the bottom of the bag and for making tiny skeins

Two toothpicks and small wooden beads for making needles

Craft glue

To make the miniature knitting bag:

Using the size 3 needles, cast on 22 stitches.

Knit in seed stitch for approx. 2.5 inches.

Knit two rows in garter stitch to form the first fold at the bottom of the bag.

Purl one row. This is the bottom of the bag.

Knit two rows in garter stitch to form the second fold.

Knit in seed stitch for approx. 2.5 inches.

Bind off.

To finish the bag:

  • Sew side seams using mattress stitch.

  • Knit a 5 inch I-cord using size 2 DPNs and two stitches. (If you don't know how to knit an I-cord, here are simple instructions at About.com . It's really, really easy.)

  • Sew I-cord to inside seam of bag to form handle.

  • Make 4 or 5 tiny skeins using scrap yarn. Dab craft glue on the yarn as you form the skein so it holds its shape.

  • Make toothpick needles by cutting the tips off of two toothpicks and using craft glue to secure each bead to the tip of each toothpick.

  • Stuff the bottom of the bag with cotton or scrap yarn. Dab glue inside so it won’t come out.

  • Arrange the tiny skeins near the top of the bag so they are slightly peeking out. Dab glue inside the bag again to secure the skeins.

  • Place the toothpick needles inside the bag so the ends stick out, as shown in the picture.